
What is the Process for Solar Panel Installation: a Step-by-Step Guide
- enze6799
- Sep 23, 2025
- 2 min read
For installing a solar panel, you can expect a site assessment, a design and quote, complete permits, installation of panels, and testing of the system. You will also enjoy monitoring and ongoing support.
Solar power feels like catching sunlight in your own backyard, right? Yes, it is exciting, empowering, and a bit magical. You might think: What is the process for solar panel installation?
It’s time to turn your curiosity into real-world wonder. Let’s walk through the entire solar panel installation process. Here you go!
A Comprehensive Guide to the Process for Solar Panel Installation
Step 1: Assessment and Site Visit
The first step of installing a solar panel is assessment and a site visit. The professional comes to check your roof, electrical setup, and shade patterns. Do you know why this checking is essential?
It is because you can figure out how many panels you can fit and which direction is right. This is the moment when you can ask questions. Be familiar with the plan before anything gets started.
Step 2: System Design and Quote
What is the cost of solar panel installation? Do not worry! You get a tailored design and a clear quote. It includes expected energy production, the equipment chosen, and pricing. It is the step where numbers meet reality!
You can learn about how much sunlight your roof actually gets versus your energy bills. This step helps you compare options like financing or rebates.
Step 3: Approvals and Paperwork
Before the installation, you have to do some paperwork, like council approvals, grid-connection forms, and permit applications. It sounds tedious, but it is standard.
Do not worry! Professionals handle most of it and keep you updated. You can rest assured that your system will be safe and legal. The system also exports excess energy back to the grid.
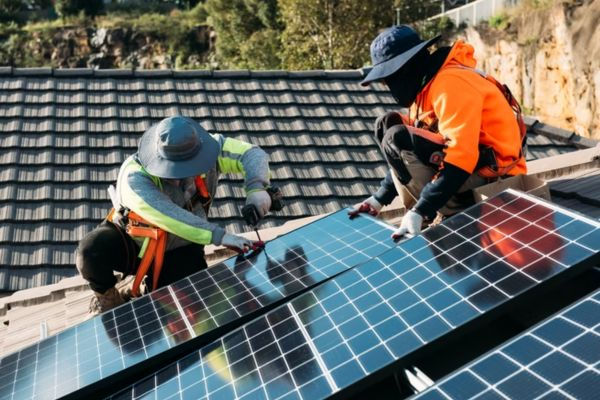
Step 4: Final Installation
You will not believe it, but solar panel installation is the fun part. Installers mount the panels, wire them to an inverter, and connect the system to your home’s electrical panel.
The team works so fast! You will get a complete guide on how to monitor performance and what to expect in the first few days.
Step 5: Testing and Support
After the installation is done, it is time for system testing. In this step, your solar system is officially turned on and monitored to make sure it performs.
You will receive documentation and support contacts. Good installers let you know the cost of maintaining a residential solar system, so there are no surprises later.
Summing Up!
Switching to solar is a great process. It is an investment in comfort, control, and a smaller footprint. Our experienced installers are ready to help you with the quality installation of solar power. Contact us to learn more.


Comments